


Taken from The Vegetarian Shabbat Cookbook. Reproduced with kind permission of Roberta Kalechofsky, Roberta Schiff and Jim Feldman, courtesy of Micah Publishing, Inc.
Shabbat – Challah
Author:
Prep time:
Cook time:
Total time:
Serves: Makes 2 loaves
Challah and wine are the crown jewels of the Shabbat dinner table, and challah is the indispensable bread. Many communities have their own special Shabbat loaves. But all the traditions of the Shabbat loaf trace their origins to the shewbread that G-d commanded the priests to place on the shewtable in the Temple (Num. 15:19-20; Ex.25:30). While we do not know the original recipe for the shewbread, we do know that it did not contain eggs as many modern-day challahs do, for the use of eggs is post-biblical. Contrary to what European Jews believe about challah, eggless challahs are traditional, and Jewish communities such as Syrian Jews do not use eggs in their challah. In honour of the double portion of manna which G-d provided for the wandering Israelites, every Shabbat we place two challot on our Shabbat table. When baking challah, it is obligatory to remove a small amount of dough – a piece about the size of an olive – before shaping the loaves. Just before baking the challot, this little piece is tossed into the hot oven and the baker says the following blessing in memory of the offerings in Temple days: Blessed are You, Lord our G-d, Ruler of the universe, Who has sanctified us with your commandments, and has commanded us to separate the challah. This ceremony is called “taking challah”. While both men and women perform it, it is one of the three mitzvoth, along with lighting the Sabbath candles and ritual immersion in the mikveh, that are special for women. Notes on this recipe: Not for the faint hearted or the kitchen-weary, but a grand experience for those who want to understand the magic of dough. This recipe comes from Jim Feldman. Trained as a scientist, the methodical process is his. It is involved, but when you are finished the taste of this challah – if made right – would have made the Temple priests jump with joy, unless they were allergic to high-gluten flour. For those who are, try a rice flour, such as Bob’s Red Mill Gluten-Free-All-Purpose Baking Flour.
Ingredients
- 2 packages active dry yeast (4½ tsp/14 g)
- 17 ounces/500 ml warm water (105-115°F/41-46°C)
- ½ cup sugar (100 g), divided
- 8 cups (35 oz/1 kg by weight) high-gluten flour [strong bread flour], e.g. “King Arthur Bread Flour”
- 2 tablespoons of agave nectar or buckwheat honey
- 2 teaspoons salt (“Lo Salt” works well)
- 3 ounces/90 ml olive oil
- ½ teaspoon turmeric
- poppy seeds (optional)
- flax seeds (for binding, optional)
- corn meal/polenta (for moving the unbaked challah to the oven)
Instructions
- Preheat the oven to 400°F/205°C/gas mark 6 for at least half an hour before baking the challah.
- Dissolve yeast in 20 oz/590 ml warm water in a large measuring cup. (105-115°F/41-46°C.)
- Stir in ¼ cup/50 g sugar, and allow the yeast to work for some minutes while you prepare the dry ingredients. (This step is called proofing. The term reflects that yeast was frequently stale or inactive, so you proved the activity of the yeast by watching it foam up.)
- Place the flour, salt, remaining sugar, and turmeric in a large bowl. Mix the dry ingredients thoroughly. (Put half the flour into the bowl, add the other dry ingredients and then the other half of the flour. Mix until the now faint colour of the turmeric is uniform through the flour.)
- Note from Jim: I use a hand mixer to do the initial mix is in the heavy ceramic bowl. The blender is easier, less messy and this mixing is before the actual kneading, which should be done by hand.
- Add oil and agave/honey and mix well again.
- Now add the proofed yeast 10 oz/295 ml at a time. Mix the flour after each addition of yeast, stirring up from the bottom to insure as much as is possible that all the dry flour gets mixed in. (As soon as the yeast has been added, put a couple of ounces of cool water in the measuring cup, swoosh it around to pick up the yeast remnants and set it aside to be used for adjusting the dough.)
- As this point, the consistency of the mix is grainy and not very dough like. It may be too dry in one part and a bit soggy in another. Kneading will cure all of this. During the kneading, a complex chemical process is going on. The yeast is consuming sugars and protein in the mix and growing. As it does this, it modifies the flour mix and turns it into that elastic and rather remarkable substance we call dough. As the yeast does its work, it requires water (just as you do when you digest food). Getting the dough to come out with the proper plasticity is a matter of touch. The advantage of hand kneading is that you cannot avoid knowing exactly how the dough feels. Here follows Jim’s advice: If you bought good bread flour, you will get a good workout.
- Knead the dough for about 10 minutes. Turn the flour mixture out onto a wide flat surface like a counter top, and scrape out all the stuff sticking to the bowl. In front of you will be some very wet globs and some flour that is pretty dry. Keep folding the lump, pressing it out with the heels of your hands and squeezing with your fingers until you have worked the mass into a reasonably uniform ball. Adding a bit of water with the traces of yeast in it to dry material will help it to mix in and become part of the dough. By this time – about 2 minutes – the ball will have earned the name “dough”, but there is still work to be done.
- Take a brief break and put the empty bowl in the sink and fill it with hot water, and back to the dough.
- You must now begin the process of adding enough water. As you knead, the dough will become pleasantly plastic but it may seem either extremely stiff or too moist and sticky. Add small amounts of water from the measuring cup to keep the dough from becoming too stiff; keep kneading if it gets too moist. Don’t add flour. The yeast will incorporate the excess water. The dough should be just this side of sticky, pleasantly elastic but not too stiff. As you add small amounts of water it will soften; as you knead it will firm up. Keep going for 9 of the 10 minutes. By this time you will be ready for a short break.
- Dump out the hot water from the mixing bowl and clean it of any remnants of the original mix. Then rinse and dry it. Now oil the bowl liberally with olive oil.
- Give your dough that last minute of kneading. Put the dough in the bowl, turning to grease it on all sides and also to make sure that the bowl sides are oiled.
- Cover the bowl with a damp, clean dish towel. The time to rise is dependent on ambient temperature. The first rise is typically about 3 hours.
- Note from Jim: For both the first and second rise, I use a sheet of parchment paper between the damp towel and the dough. It keeps the dough from sticking to the towel. I make use of the first sheet folded up between dough and scale during the divide-and-braid stage.
- Punch the dough down again and knead briefly. Use a heavy, sharp knife to cut the dough in half. To make two equal halves, weigh the halves and bring them to the same weight. Typically, by this time each of the two dough balls weighs 36 ounces (just over 1 kg). Cover one while you shape the first loaf.
- Divide one dough ball into four equal parts by weight. Squeeze and then roll each one into a “snake”, using a back and forth motion and keeping the dough under the palms of your hands. Each “snake” should be about 16″/40 cm long.
- Pinch the strands together at one end, braid them, and pinch together at the other end. [The braiding formula that Jim uses – and as this formula comes from a male who never braided his daughter’s hair, you may have a better way – is to number the strands from left to right: ABCD. A goes over C and then twist A & C half a turn. Now the strands are arranged BACD with a half twist of AC. Do the mirror operation from the right. D over two strands and half a twist with A to make BADC. Note that the two inside strands have moved to the outside. Repeat the same operations, left and then right, until the loaf is finished. At this point, this high-gluten bread dough will seem to have a mind of its own. It will refuse to stay bonded at the ends. The cure Jim uses is to run a wooden skewer sidewise through each end. (Remember to remove just after they come out of the oven. Once the bread cools, you would have a fight on your hands.)
- Repeat with the second loaf.
- Note from Jim: When I have finished braiding a loaf, I squeeze gently from the end and role the whole loaf back and forth. This compacts the loaf and shapes it. Once satisfied with the compactness and shape, I insert a 15 cm wooded skewer sideways in each end to secure the strands. After braiding and inserting the skewers, I put the formed loaves into non-stick aluminum cake pan, one to a pan, with a thin layer of corn meal on the bottom. The loaves are definitely going to grow, but the dough will be soft at this point, so the growth will be mostly lateral. The final shaping rise which yields the beautiful loaf will happen in the oven.
- Allow them to rise for another two to three hours at 20 °C.
- Now comes a choice. If you want poppy seeds on your challah, you must use some binder to hold them on the bread. (If you don’t want poppy seeds, skip to the next paragraph.) One vegan binder is to take a tablespoon of flax seed and two ounces/60 ml of water. Mix in a blender at high speed until the mixture gets milky. Then brush it on the loaves and sprinkle heavily with poppy seeds. Alternatively, soya milk may be used as a binder. [Poppy seeds can be purchased inexpensively in bulk over the internet.] Remember that the loaves will double in size so that a dense spread of seeds will thin out by quite a bit. Now to the baking.
- Using a baker’s peel (large spatula) with a thin coating of corn meal/polenta as a lubricant, place loaves on the stone or baking sheet [baking tray].
- Note from Jim: The loaf is very soft and a tad sticky at this point so the peel must be “lubricated” with corn meal to allow the loaf to slide off in the oven. To transfer the loaf to the peel, I use a large plastic spatula from one side and my fingers from the other. The peel allows me to place the first loaf near the back of the baking stone, where I use the spatula to ease it off the peel. Repeat for the second loaf, once again coating the peel with cornmeal.
- Bake for 34 minutes at 400 °F/205 °C/gas mark 6. While baking, about every 5 to 10 minutes, spray the walls of the oven and the bread with water to increase the humidity in the oven and thus get a crisper crust.
- Note from Jim: I use one of the small hand sprayers that are often used on indoor greenery, but not one with too fine a mist. I repeat this every 7 minutes. Don’t be afraid to spray on the loaves themselves. If you are doing enough, you should get a puff of steam in the face when you next open the oven door.
- At about 16 minutes from the end of the bake, you should remove the loaves and reverse their positions. No oven with two loaves in it can be uniform. You will note at this point that the two sides of each loaf are not uniformly brown. By reversing position (including putting the inside sides toward the oven wall or door) you will get a uniform coloured crust.
- When you take the loaves out of the oven, before turning off the oven, tap the bottom of each loaf to be sure that you get a hollow sound all along the loaf. If so, you are done; if not, put them in for another 5 minutes. (Take out those skewers!)
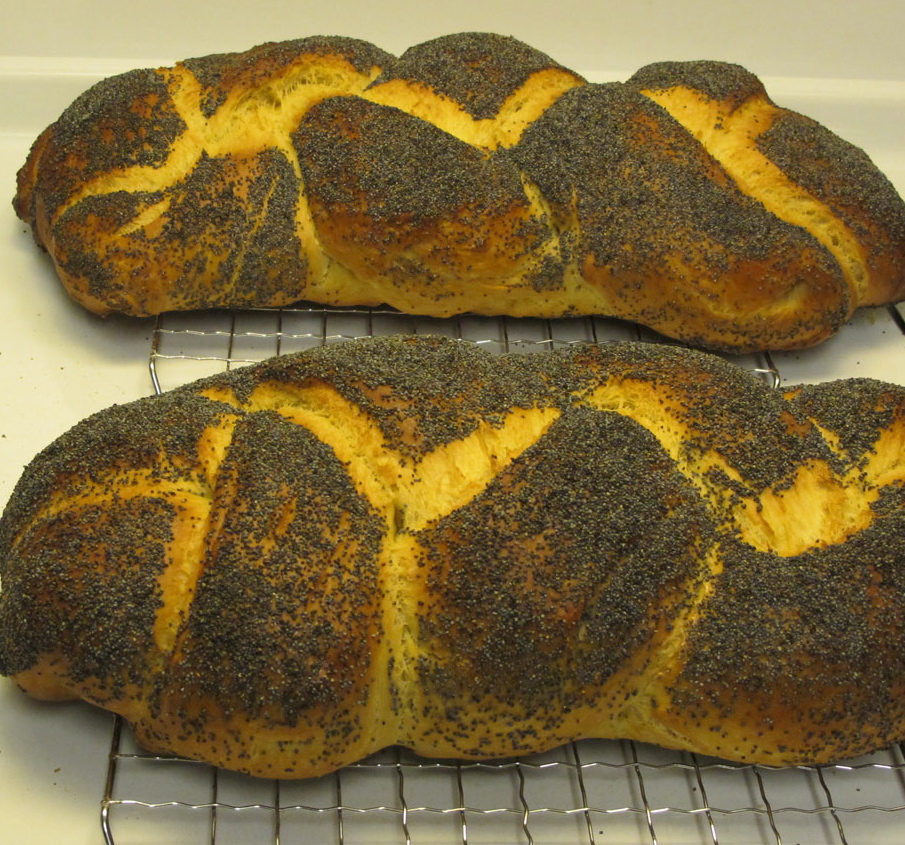
- Leave the loaves on a drying rack for at least half an hour to allow moisture to escape.
- You’re done!
Notes
In addition to the 1 hour 34 minute preparation and cooking time, please allow approximately 6 hours for rising.
The 2nd rise

After seeding

Challot in the oven

